Gas pipelines play a crucial role in delivering energy to homes, industries, and power stations. If you’re planning a gas infrastructure project, knowing exactly how to install a gas pipeline is essential for safety, efficiency, and long-term performance. Whether you’re a project manager, engineer, or contractor, this comprehensive guide will walk you through the key steps, from planning and material selection to installation and post-construction monitoring.
Why Proper Planning Is Crucial
Before diving into the technical aspects, planning is the foundation of a successful pipeline project. Poor planning can lead to delays, cost overruns, safety issues, and environmental damage.
. This step includes analyzing existing infrastructure, land ownership, and potential environmental constraints. It’s also essential to consult with stakeholders, including regulatory bodies and local communities, during the planning stage.
A well-prepared plan also includes a budget breakdown, timeline estimates, risk assessments, and emergency response strategies. All of these elements help ensure that the project stays on track and avoids unforeseen obstacles.
Designing the Pipeline System
Designing the pipeline is the next major milestone. This step requires engineering expertise to determine the right specifications for safe and efficient operation.
Key design considerations include:
- Type of gas being transported (e.g., natural gas, LPG)
- Pipeline diameter and wall thickness
- Operating pressure and temperature
- Material selection based on terrain and environmental conditions
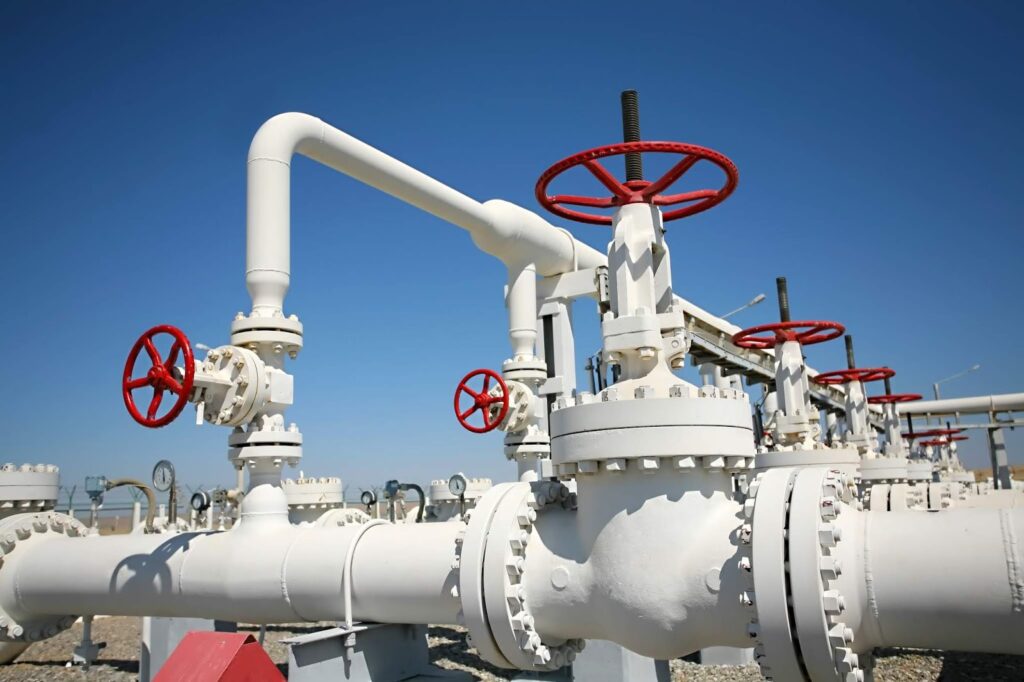
- Safety mechanisms like pressure relief valves, shut-off systems, and corrosion protection
Professional design ensures compliance with national and international safety standards while also optimizing the pipeline’s performance and durability.
Navigating Regulatory Requirements
Understanding how to install a gas pipeline also means being familiar with the legal landscape. Regulatory compliance is non-negotiable in gas infrastructure projects.
Depending on your location, you’ll need to obtain permits from national energy regulatory bodies, environmental agencies, and possibly local municipalities. These permits often require environmental impact assessments, safety plans, and detailed engineering drawings. Skipping or overlooking any of these steps can halt your project and lead to legal consequences.
Make sure to maintain documentation throughout the permitting process and engage in public consultations if required. Transparency and regulatory alignment will reduce delays and ensure community support.
Site Assessment and Preparation
Once your permits are approved, the focus shifts to site assessment and preparation. This stage is vital for creating a safe working environment and laying the groundwork for a smooth installation.
Site assessment involves:
- Topographical surveys
- Soil testing
- Utility mapping to avoid damaging existing infrastructure
- Environmental analysis
After the assessment, clear the land of vegetation, debris, or structures obstructing the pipeline route. If the terrain is uneven or unstable, it may need to be levelled or reinforced. Safety barriers, signage, and restricted zones should also be established to protect workers and nearby residents.
Choosing the Right Materials and Equipment
A key factor in determining how to install a gas pipeline successfully is selecting the correct materials and tools. The material must be compatible with the type of gas, operating pressure, and environmental conditions.
Common pipeline materials include:
- Steel: Suitable for high-pressure and long-distance pipelines, but prone to corrosion without proper coatings or cathodic protection.
- Polyethylene (PE): Lightweight, corrosion-resistant, and ideal for low-pressure applications.
- PVC: Durable and cost-effective, but not suitable for all types of gas.
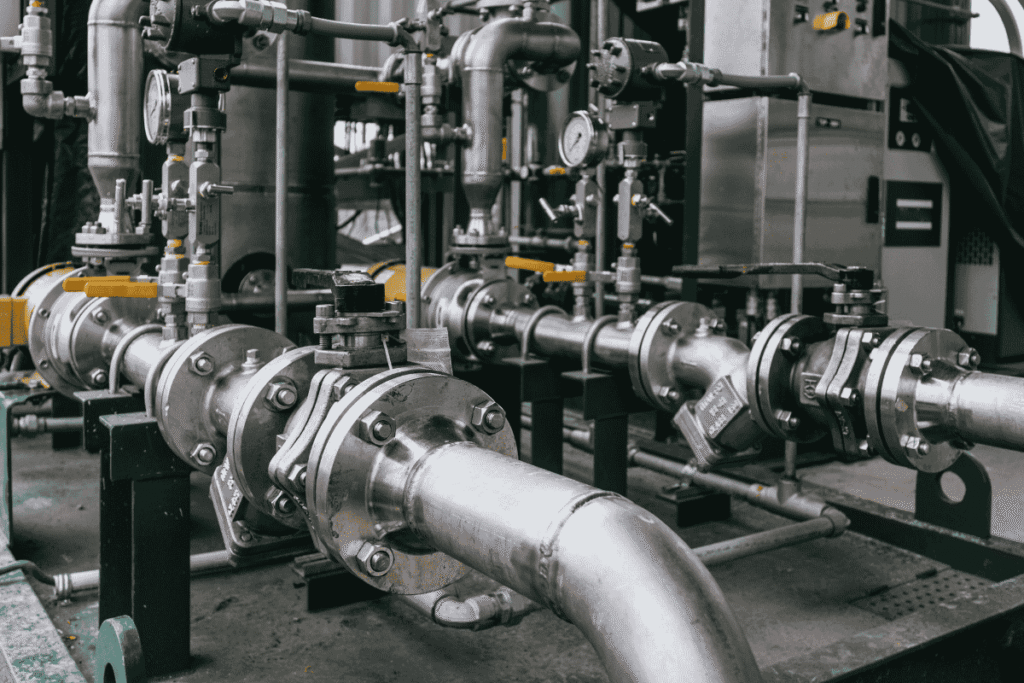
In terms of equipment, you’ll need trenchers, welding tools, jointing kits, and testing devices. For complex environments, trenchless technology like horizontal directional drilling (HDD) can minimize surface disruption. Using modern tools and maintaining them properly helps ensure precision, efficiency, and safety.
Step-by-Step Pipeline Installation Process
Here’s a breakdown of how to install a gas pipeline from start to finish:
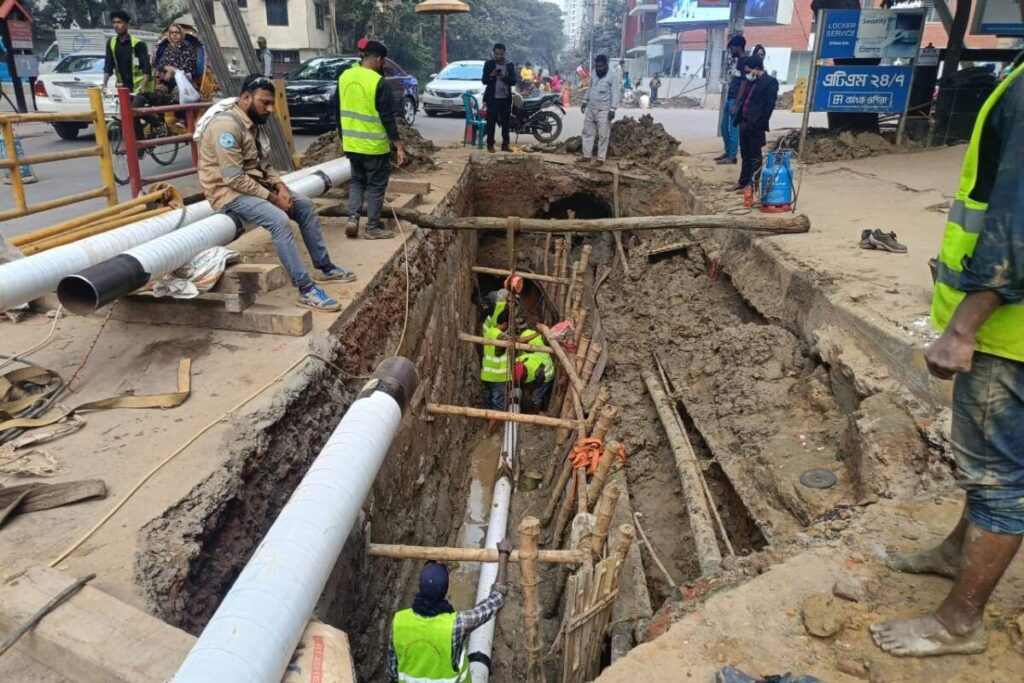
- Trenching
Dig trenches along the planned route based on pipeline depth and width specifications. In urban or environmentally sensitive areas, opt for trenchless methods. - Pipe Laying
Lay pipes into the trench and align them correctly. Ensure no debris enters the pipe during this phase. - Joining and Welding
For steel pipes, welding is typically used and must follow strict quality control. For PE or PVC pipes, fusion or mechanical fittings are common. - Inspection of Joints
Each connection is visually and technically inspected to detect any imperfections or leaks. - Backfilling
Carefully cover the pipeline with fine soil or sand to protect it from damage. Avoid using sharp rocks or heavy debris. - Marking and Signage
Install visible markers to indicate the pipeline’s location for future reference and safety purposes. - Cathodic Protection and Coating
Apply protective coatings and install cathodic protection systems to prevent corrosion, especially in steel pipelines.
Safety Measures and Risk Mitigation
Safety must be the top priority during gas pipeline installation. Conduct regular safety briefings and ensure that all workers are equipped with personal protective equipment (PPE), including helmets, gloves, and high-visibility clothing.
Establish an on-site safety officer responsible for monitoring compliance with safety protocols. In addition, create an emergency response plan that includes communication systems, evacuation procedures, and access to medical assistance.
Implement safety controls like:
- Gas leak detectors
- Pressure regulators
- Shut-off valves at key junctions
By following these best practices, the risk of injury or property damage is significantly reduced.
Testing and Quality Assurance
Once the pipeline is installed, rigorous testing ensures its integrity and readiness for operation.
- Hydrostatic testing: The pipeline is filled with water and pressurized beyond its operating level to check for leaks.
- Non-destructive testing (NDT): Techniques like radiography or ultrasonic testing inspect weld quality without harming the pipe.
- Pressure testing: Validates the pipeline’s ability to handle actual working conditions.
Document all test results for regulatory audits and future maintenance planning.
Post-Installation Maintenance and Monitoring
Knowing how to install a gas pipeline doesn’t end with construction. Long-term success depends on ongoing maintenance and real-time monitoring.
Use smart monitoring systems to track pressure, temperature, and flow rate. Sensors can detect leaks or abnormal readings and trigger alerts. Periodic inspections using inline inspection tools, or “smart pigs,” help assess pipeline health and spot issues like corrosion or wear.
A preventative maintenance schedule includes cleaning, repainting, valve testing, and replacing worn components. This ensures system efficiency and extends the pipeline’s service life.
Conclusion
Installing a gas pipeline is a complex yet rewarding project that requires a blend of technical knowledge, safety discipline, and regulatory awareness. From planning and material selection to construction and maintenance, every step matters.
By understanding exactly how to install a gas pipeline and following best practices, you can build a system that is not only safe and efficient but also durable and compliant with industry standards.
As technology continues to evolve, incorporating smart monitoring tools and sustainable practices will play an even bigger role in the future of pipeline infrastructure. Investing in quality now will ensure reliable gas delivery for years to come.